What should we ask when a new vulnerability is disclosed?
AI-assisted pentesting and code analysis tools are accelerating vulnerability research. Reviewing more code helps uncover previously overlooked defects. Anthropic’s Project Glasswing update describes how verifying and patching AI-discovered vulnerabilities has become a substantial workload. A discovered finding and a publicly disclosed CVE are separate milestones.
Two recent examples: Node.js and PHP2Shell
The advisories published on October 21, 2026 illustrate the challenge:
| Example | Vulnerability and operational impact |
|---|---|
| Node.js / Brotli — CVE-2026-111497 | An out-of-bounds write in the Brotli decoder can corrupt memory and potentially lead to remote code execution when an application processes attacker-controlled compressed input. Security updates were released for the 22.x, 24.x, and 26.x branches. |
| PHP / PHP2Shell — CVE-2026-109618 and CVE-2026-109619 | Two critical request/memory-management vulnerabilities can allow unauthenticated remote code execution in installations serving web requests. The advisory covers PHP-FPM, mod_php, php-cgi, FrankenPHP, and LiteSpeed. |
Node.js lists 22.23.4, 24.22.1, and 26.12.1 as patched releases. Source: Node.js security advisory, October 21, 2026. PHP released 8.2.35, 8.3.36, 8.4.27, and 8.5.12 that day; distribution packages may include backported fixes, so also check your vendor’s advisory. Source: PHP’s official advisory. These are the fixes for those advisories; for a new installation, use the current security release of a supported branch.
When an advisory arrives, my first questions are: where do we run Node.js or PHP, which versions are installed, and which systems serve external traffic? Fleet’s centralized inventory helps investigate the first two questions. Internet exposure, use of the vulnerable code path, and runtimes inside containers still need separate verification. These examples explain the need for visibility; they do not claim that Fleet automatically detects every affected instance.
I expect the volume of findings and advisories to keep growing as these tools become more widely available. That brings a familiar operational question up more often: “Does this vulnerability affect our environment?”
For every advisory, we need to identify devices running the application, installed versions, and update status. Repeated scans, separate spreadsheets, and manual comparisons become difficult to sustain as endpoint counts grow. Often the first delay is finding a reliable inventory, before assessing the vulnerability itself.
While researching a centralized approach, I came across FleetDM. Bringing devices, installed software, known vulnerabilities, and post-update verification together addressed much of what I needed.
In this guide, I walk through deploying FleetDM on Ubuntu, enrolling Windows devices, and using the collected inventory for vulnerability tracking. I also cover certificate trust, enrollment secrets, and agent-update issues encountered along the way.
The goal is to reach affected systems faster using current inventory instead of building a new device list for each advisory. Fleet provides visibility; application-specific testing, network scanning, and patch verification remain part of the process.
1. What is FleetDM? Is it open source and free?
Fleet (FleetDM) combines device inventory, osquery-based queries, software visibility, and endpoint management in a central interface. This guide focuses on visibility using the self-hosted Free edition.
The open-source foundation and paid features have different licensing terms: the repository’s general code is MIT-licensed, while enterprise code under ee/ has a separate license. Premium functionality should not all be treated as MIT-licensed. Source: Fleet’s license file.
Free versus Premium
According to the official plan comparison, checked on October 30, 2026:
| Capability | Free | Premium |
|---|---|---|
| Device/software inventory and continuous scanning | Included | Included |
| Queries/reports, policies, CLI, and REST API | Included | Included |
| Vulnerability scores and CISA KEV information | Not included | Included |
| Enforced OS updates and disk encryption | Not included | Included |
| Application deployment and self-service installation | Not included | Included |
| Fleets grouping, RBAC, and audit logging | Not included | Included |
| SSO | Included | Included |
| Support | Community | Commercial support |
The Free license costs zero; hosting, backups, and operational effort still have a cost. Free visibility does not automatically include Premium deployment and management capabilities. OS coverage varies, so check the current matrix before deployment or purchase.
You can start this vulnerability-visibility workflow with Free. For update distribution, use existing deployment tools or evaluate Premium.
The fleetd endpoint agent, with Orbit and osquery, collects and sends device information to Fleet. This lets us inspect applications and versions without connecting to each computer individually.
Enroll devices in Fleet
          ↓
Collect software and version inventory
          ↓
Review known CVE matches from supported sources
          ↓
Identify affected devices and priorities
          ↓
Deploy updates and verify inventory and findings
Inventory presence does not mean every vulnerability has been detected. Product/version matching, data sources, and freshness influence results. An empty findings list is not proof that a device is secure.
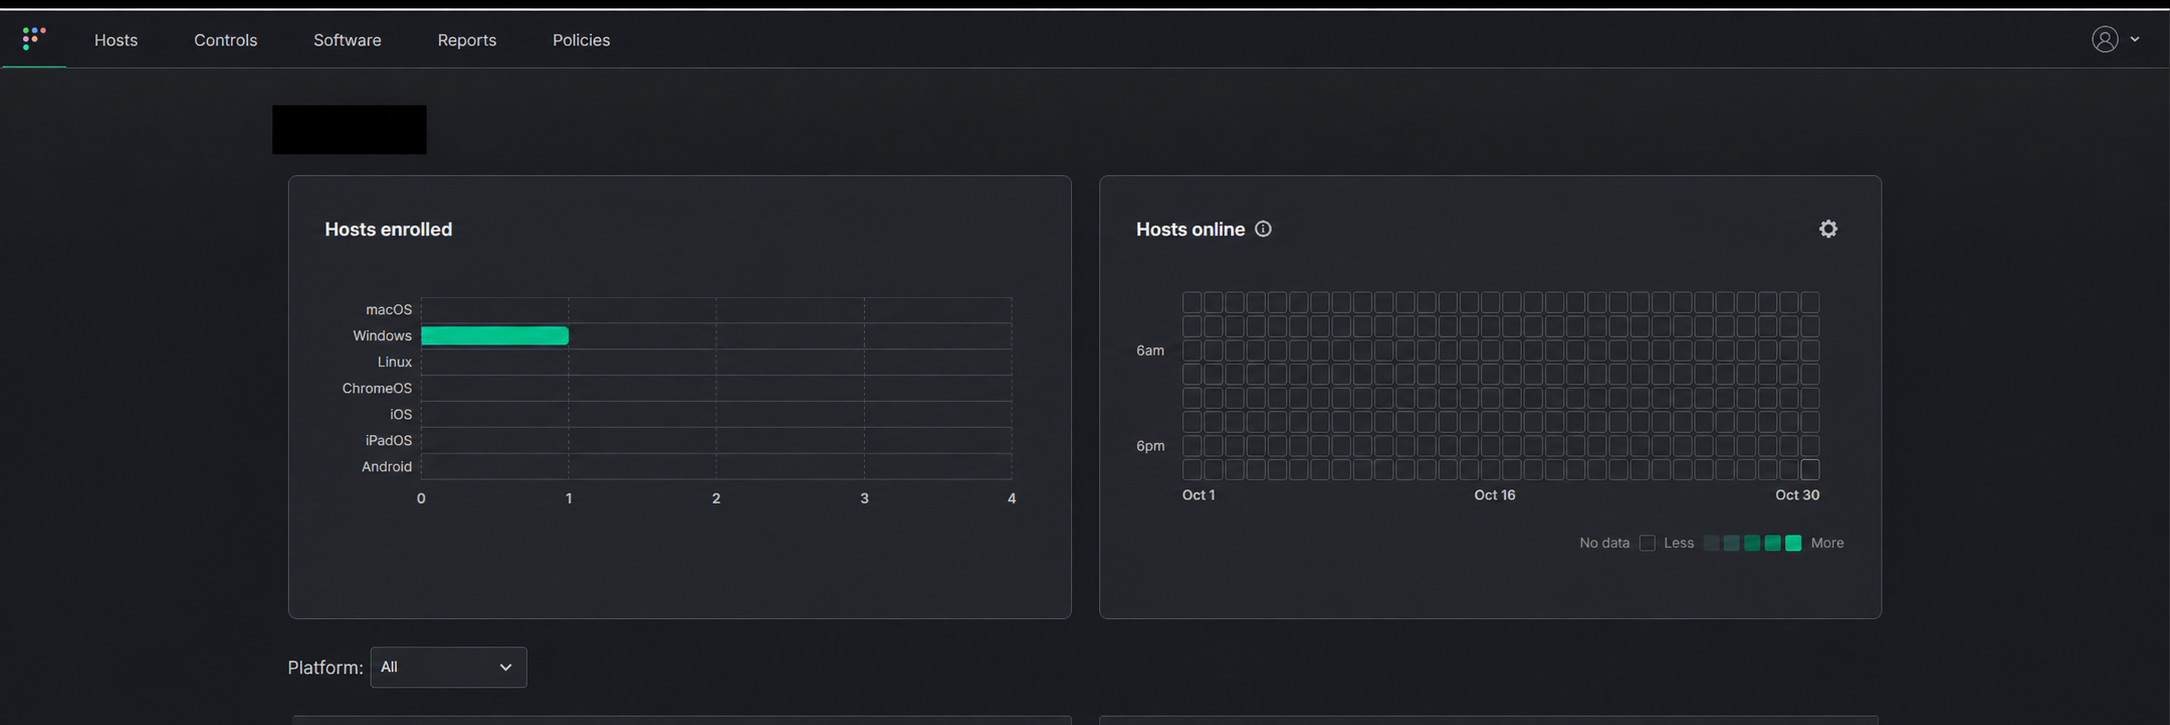
2. Architecture and prerequisites
This deployment runs Fleet as a systemd service on Ubuntu. MySQL stores persistent data, Redis supports internal workflows, and Windows endpoints connect over HTTPS. Elasticsearch, Kibana, and Filebeat form an optional logging layer.
Windows endpoints / fleetd
          │ HTTPS :8443
          ▼
Ubuntu / Fleet hizmeti
          ├── MySQL / 127.0.0.1:3306
          ├── Redis / 127.0.0.1:6379
          └── systemd journal
                    └── Filebeat → Elasticsearch → Kibana (optional)
Examples use fleet.example.internal; replace it with your own DNS record. Device names, user details, and organization addresses use example values.
Prepare the following:
- A supported Ubuntu LTS server and an account with
sudoaccess. - A DNS record pointing to the server and resolvable from Windows endpoints.
- A TLS certificate covering that DNS name in its SAN, plus its private key.
- A Windows test device and software to inspect.
- MySQL and Redis releases compatible with your selected Fleet version.
Check Fleet’s official FAQ for compatibility. The newest database package is not necessarily supported by every Fleet release. These examples describe a fresh installation, not an existing database upgrade or migration.
3. Install Ubuntu dependencies, MySQL, and Redis
Run these commands on the Ubuntu server:
sudo apt update
sudo apt install -y ca-certificates curl openssl tar mysql-server redis-server
sudo systemctl enable --now mysql redis-server
sudo systemctl status mysql redis-server --no-pager
The services should be active (running). Inspect failed services before proceeding:
sudo journalctl -u mysql -n 100 --no-pager
sudo journalctl -u redis-server -n 100 --no-pager
redis-cli -h 127.0.0.1 ping
The last command should return PONG in this local Redis example without authentication. Adapt the check if authentication is enabled. MySQL and Redis are not exposed to endpoint networks; Fleet uses loopback. Verify Redis bind/protected-mode settings and MySQL’s listening address:
sudo ss -lntpCreate Fleet’s database
Open a MySQL administration session:
sudo mysqlCreate a dedicated database/account, replacing the password with a strong unique value:
CREATE DATABASE fleet CHARACTER SET utf8mb4 COLLATE utf8mb4_unicode_ci;
CREATE USER 'fleet'@'127.0.0.1' IDENTIFIED BY 'REPLACE_WITH_STRONG_PASSWORD';
GRANT ALL PRIVILEGES ON fleet.* TO 'fleet'@'127.0.0.1';
EXIT;
The account is defined for 127.0.0.1, so Fleet must use that address too. Privileges are limited to the Fleet database; we do not use a server-wide MySQL administrator account. Test the connection:
mysql -h 127.0.0.1 -u fleet -p fleet -e 'SELECT 1;'The password is requested interactively. Resolve account, password, and host-matching errors before continuing.
4. Fleet binary, certificates, and configuration
Install the Fleet binary
This example pins Fleet 4.94.0, checked on October 30, 2026, on an Ubuntu x86_64/amd64 server. The server archive is fleet_v4.94.0_linux.tar.gz; the Linux administration client is fleetctl_v4.94.0_linux_amd64.tar.gz. Reference: official Fleet 4.94.0 release. This server package targets amd64; do not just substitute an ARM filename on an ARM server. Choose a supported deployment method for that platform separately.
Run this block in Bash on the Ubuntu server. It creates a fresh temporary workspace, downloads both archives and the checksum manifest using curl, then verifies the two selected SHA-256 entries. Any failure stops installation. This is a fresh-install procedure, not an instruction to overwrite an existing deployment during an unplanned upgrade.
(
  set -euo pipefail

  FLEET_VERSION='4.94.0'
  case "$(uname -m)" in
    x86_64|amd64) ;;
    *) printf '%s\n' 'This server package requires Linux amd64.' >&2; exit 1 ;;
  esac

  FLEET_RELEASE_URL="https://github.com/fleetdm/fleet/releases/download/fleet-v${FLEET_VERSION}"
  FLEET_ARCHIVE="fleet_v${FLEET_VERSION}_linux.tar.gz"
  FLEETCTL_ARCHIVE="fleetctl_v${FLEET_VERSION}_linux_amd64.tar.gz"
  FLEET_WORKDIR="$(mktemp -d "${TMPDIR:-/tmp}/fleet-install.XXXXXX")"
  cd "$FLEET_WORKDIR"

  curl --fail --show-error --location --retry 3 \
    --output "$FLEET_ARCHIVE" "$FLEET_RELEASE_URL/$FLEET_ARCHIVE"
  curl --fail --show-error --location --retry 3 \
    --output "$FLEETCTL_ARCHIVE" "$FLEET_RELEASE_URL/$FLEETCTL_ARCHIVE"
  curl --fail --show-error --location --retry 3 \
    --output checksums.txt "$FLEET_RELEASE_URL/checksums.txt"

  awk -v server="$FLEET_ARCHIVE" -v cli="$FLEETCTL_ARCHIVE" \
    '$2 == server || $2 == cli' checksums.txt > selected-checksums.txt
  test "$(wc -l < selected-checksums.txt)" -eq 2
  sha256sum --check selected-checksums.txt

  tar -tzf "$FLEET_ARCHIVE"
  tar -tzf "$FLEETCTL_ARCHIVE"
  mkdir server cli
  tar -xzf "$FLEET_ARCHIVE" -C server --strip-components=1
  tar -xzf "$FLEETCTL_ARCHIVE" -C cli --strip-components=1
  test -f server/fleet
  test -f cli/fleetctl

  sudo install -d -o root -g root -m 0755 /usr/local/bin
  sudo install -o root -g root -m 0755 server/fleet /usr/local/bin/fleet
  sudo install -o root -g root -m 0755 cli/fleetctl /usr/local/bin/fleetctl

  /usr/local/bin/fleet --version
  /usr/local/bin/fleetctl --version
  printf 'Downloaded archives: %s\n' "$FLEET_WORKDIR"
)
Both archives should report OK. curl --fail stops on HTTP errors; --location follows GitHub’s download redirects. Both archives wrap their contents in a top-level directory, so extraction uses --strip-components=1. install copies the binaries into /usr/local/bin with root ownership and 0755 permissions, matching the systemd unit’s ExecStart path.
Downloaded files remain in the temporary directory printed at the end; the installed binaries do not depend on that directory. Parentheses scope variables and set -euo pipefail to this block. Before changing FLEET_VERSION, check that release’s asset names and archive structure.
Verify PATH and the installed binaries
hash -r
command -v fleet
command -v fleetctl
ls -l /usr/local/bin/fleet /usr/local/bin/fleetctl
/usr/local/bin/fleet serve --help
/usr/local/bin/fleet prepare db --help
/usr/local/bin/fleetctl package --help
command -v should resolve to /usr/local/bin/fleet and /usr/local/bin/fleetctl. Another path may indicate an older installation taking precedence; verify using the absolute paths above. These are Linux binaries; we generate the Windows endpoint’s fleetd-base.msi agent package later.
Create the service account and directories
Use a separate system account:
sudo useradd --system --home-dir /var/lib/fleet --shell /usr/sbin/nologin fleet
sudo install -d -o root -g fleet -m 0750 /etc/fleet /etc/fleet/certs
sudo install -d -o fleet -g fleet -m 0750 /var/lib/fleet
Do not recreate an existing account. From the directory containing your certificate files, install the full chain and private key:
sudo install -o root -g fleet -m 0640 ./fullchain.pem /etc/fleet/certs/fullchain.pem
sudo install -o root -g fleet -m 0640 ./privkey.pem /etc/fleet/certs/privkey.pem
openssl x509 -in /etc/fleet/certs/fullchain.pem -noout -subject -issuer -dates -ext subjectAltName
The SAN must contain fleet.example.internal. For a private CA, also prepare the CA certificate for clients. Never distribute the server private key to endpoints.
Create Fleet’s configuration
sudoedit /etc/fleet/fleet.ymlThis single-server example terminates TLS in Fleet on port 8443. We supply secrets through a service environment file below. Keep paths consistent across TLS validation, CLI configuration, and agent packaging.
mysql:
  address: 127.0.0.1:3306
  database: fleet
  username: fleet

redis:
  address: 127.0.0.1:6379

server:
  address: 0.0.0.0:8443
  tls: true
  cert: /etc/fleet/certs/fullchain.pem
  key: /etc/fleet/certs/privkey.pem
Add Redis authentication/TLS settings if needed. Consult Fleet server configuration for release-specific fields. Restrict file access to the administrator and Fleet service account:
sudo chown root:fleet /etc/fleet/fleet.yml
sudo chmod 0640 /etc/fleet/fleet.yml
Supply secrets to the service
Put the MySQL password and Fleet application key in a root-readable environment file. This uses filesystem permissions, not a secret vault. Adapt it to your organization’s secret-management system where appropriate.
sudo install -d -o root -g root -m 0700 /etc/fleet/secrets
sudo test -e /etc/fleet/secrets/fleet.env || sudo install -o root -g root -m 0600 /dev/null /etc/fleet/secrets/fleet.env
sudoedit /etc/fleet/secrets/fleet.env
These commands preserve an existing file. Verify root ownership and 0600 permissions if it already exists. Replace the placeholders:
FLEET_MYSQL_PASSWORD='ACTUAL_MYSQL_ACCOUNT_PASSWORD'
FLEET_SERVER_PRIVATE_KEY='UNIQUE_RANDOM_APPLICATION_KEY'
Generate a separate application key with openssl rand -base64 32. It differs from the TLS private key, must remain stable across restarts, and belongs in the backup plan. Do not include shell commands or export in the file. If a password contains a single quote, escape it compatibly with Bash and systemd; database preparation also reads this file through Bash.
5. Prepare the database and start Fleet
Run this on the Ubuntu server. This one-time administration step uses root to read the protected environment file. The service below runs as fleet; both operations receive the same database password:
sudo bash -c 'set -a; . /etc/fleet/secrets/fleet.env; set +a; exec /usr/local/bin/fleet prepare db --config /etc/fleet/fleet.yml'Continue only after preparation succeeds. Back up existing deployments and plan migration rollback before upgrades.
Create the systemd unit:
sudoedit /etc/systemd/system/fleet.service[Unit]
Description=Fleet server
Wants=network-online.target
After=network-online.target mysql.service redis-server.service
[Service]
Type=simple
User=fleet
Group=fleet
WorkingDirectory=/var/lib/fleet
EnvironmentFile=/etc/fleet/secrets/fleet.env
ExecStart=/usr/local/bin/fleet serve --config /etc/fleet/fleet.yml
Restart=on-failure
RestartSec=5
UMask=0027
NoNewPrivileges=true
PrivateTmp=true
[Install]
WantedBy=multi-user.targetEnable and inspect the service:
sudo systemctl daemon-reload
sudo systemctl enable --now fleet
sudo systemctl status fleet --no-pager
sudo journalctl -u fleet -n 100 --no-pager
Confirm active (running), then open https://fleet.example.internal:8443. Allow the port only from required endpoint/management networks. MySQL and Redis need no inbound access from those networks.
Complete initial setup with administrator and organization details. Keep Fleet’s external URL and agent packages on the same hostname and port. If adding a reverse proxy on 443, update the external URL and certificate flow.
Verify the certificate served over the network
Verify what Fleet serves, not only the local certificate file. These examples assume /etc/fleet/certs/ROOT-CA.pem contains the trusted root and any required intermediates, never the private key. A self-signed lab certificate may itself be the trust anchor.
openssl s_client -connect fleet.example.internal:8443 \
  -servername fleet.example.internal \
  -CAfile /etc/fleet/certs/ROOT-CA.pem \
  -verify_hostname fleet.example.internal -verify_return_error </dev/null

curl --cacert /etc/fleet/certs/ROOT-CA.pem \
  -I https://fleet.example.internal:8443
Chain and hostname verification should pass; curl should report no TLS validation error. Assess the HTTP response separately. IP-based access requires a matching IP SAN; DNS SAN alone is insufficient. Replace the example hostname with your own.
6. Enroll Windows devices
Validate enrollment on one Windows test device before distributing the agent more widely.
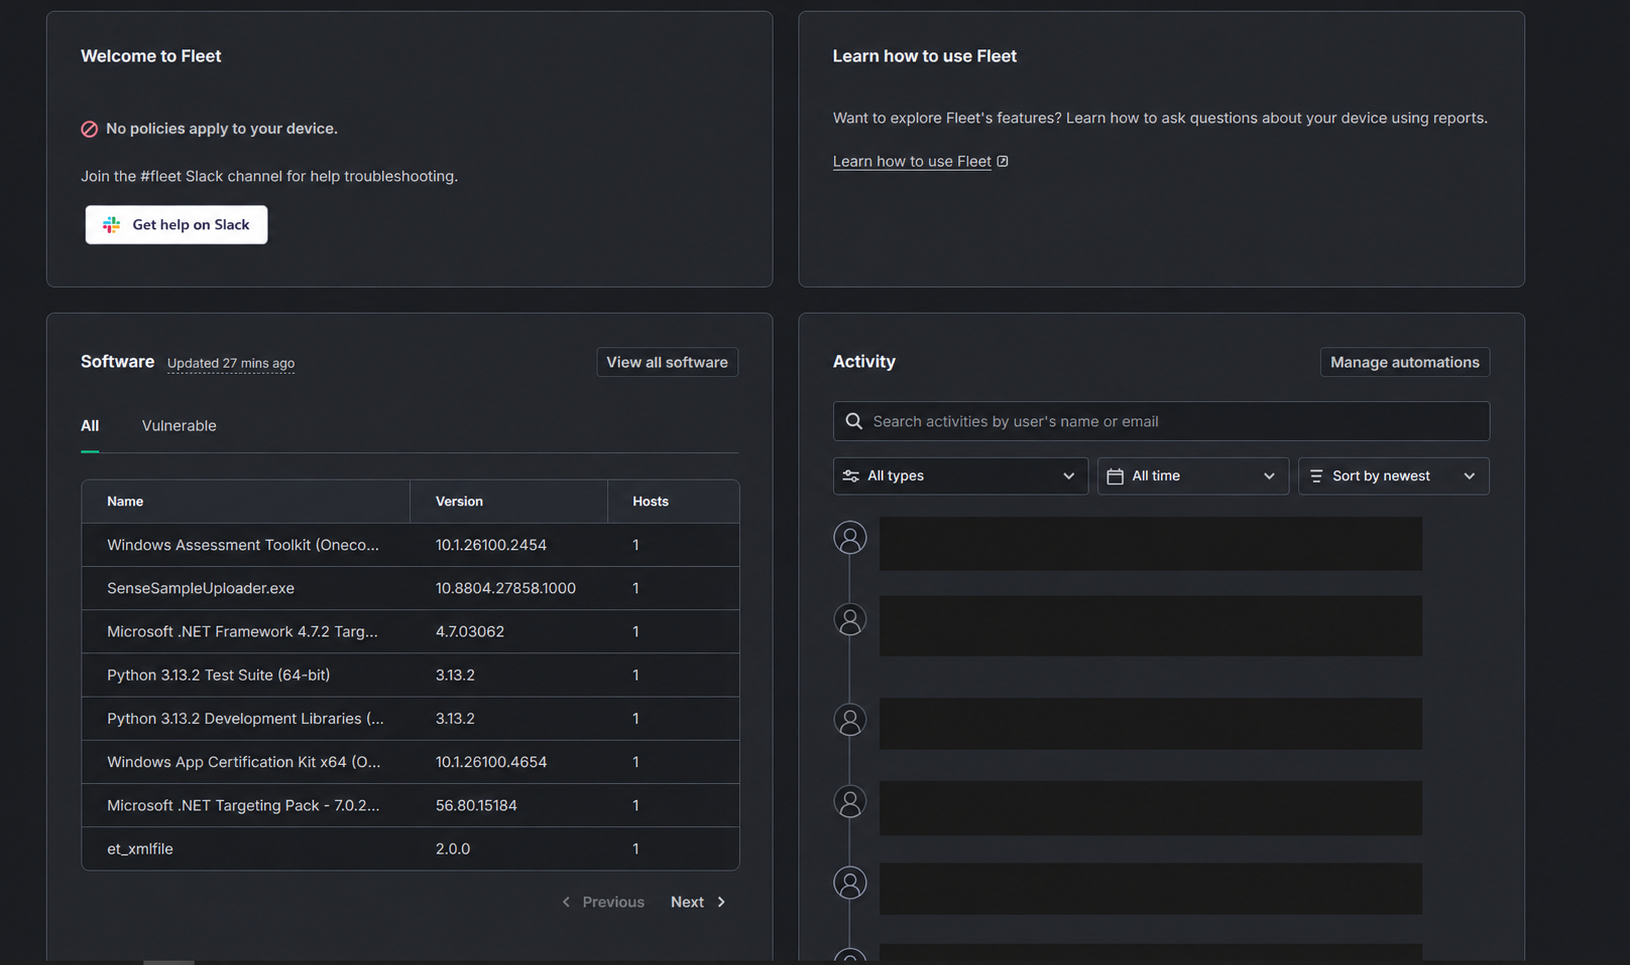
Install fleetctl on the management machine
Install the appropriate package from Fleet downloads. It can run on the Fleet server or a management computer with API access.
fleetctl --version
fleetctl config set --address https://fleet.example.internal:8443
fleetctl config set --root-ca /etc/fleet/certs/ROOT-CA.pem
fleetctl login
Configuration belongs to the user running the command; it does not automatically transfer to another machine. SSO/2FA accounts may need an API token; see the Fleetctl guide.
Use the correct private-CA option
In this lab, fleetctl config set --tls-ca ... failed with flag provided but not defined: -tls-ca. The tested version uses --root-ca. Check fleetctl config set --help. The CA file must exist on the management machine; use a local Windows path if running there.
The CLI uses --root-ca; agent packaging uses --fleet-certificate. Configuring one does not configure the other. If an API token is needed, use the protected configuration method in the official guide instead of putting it in shell history.
Generate the agent package
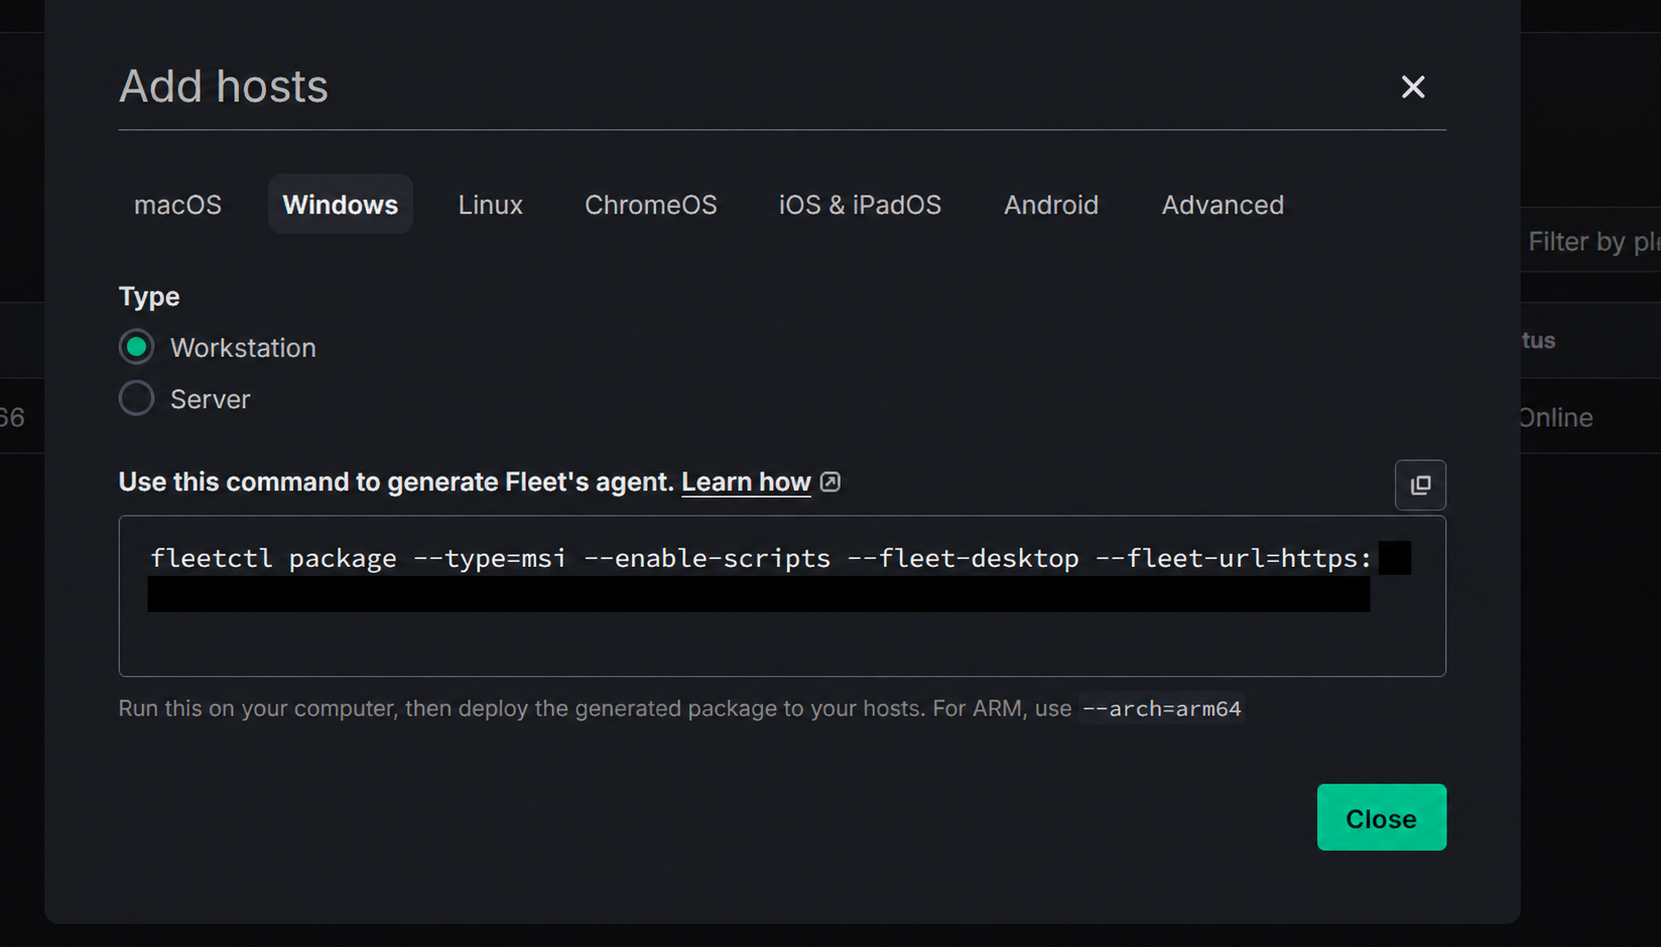
Go to Hosts → Add hosts → Windows. Select the right team/scope where available and copy the generated command to use your environment’s URL and enrollment secret. Check options with:
fleetctl package --helpSupply a private CA using the supported --fleet-certificate option. Use a hostname in the certificate SAN; an uncovered IP address fails validation. See the enrollment guide.
An enrollment secret authorizes registration; it is not a user’s Fleet password. Control access to the MSI because it contains enrollment configuration.
After confirming the supported options, package on the Ubuntu management machine:
read -r -s -p 'Enrollment secret: ' FLEET_ENROLL_SECRET
printf '\n'
fleetctl package \
  --type=msi \
  --fleet-url=https://fleet.example.internal:8443 \
  --enroll-secret="$FLEET_ENROLL_SECRET" \
  --fleet-desktop \
  --fleet-certificate=/etc/fleet/certs/ROOT-CA.pem
unset FLEET_ENROLL_SECRET
sha256sum fleetd-base.msi
read keeps the entered secret out of plain-text shell history. Privileged users inspecting process arguments may still see it during packaging. Use your organization’s secret management for automation. This is Bash; on Windows use the UI’s PowerShell command.
Install the MSI on Windows
Transfer the generated MSI to the test endpoint. Use its actual path in elevated PowerShell:
$packagePath = 'C:\Temp\fleetd-base.msi'
Get-FileHash -LiteralPath $packagePath -Algorithm SHA256
$installResult = Start-Process msiexec.exe -WindowStyle Hidden -Wait -PassThru `
  -ArgumentList '/i "C:\Temp\fleetd-base.msi" /qn /norestart /L*v "C:\Temp\fleetd-install.log"'
$installResult.ExitCode
Get-Content -LiteralPath 'C:\Temp\fleetd-install.log' -Tail 80
Get-Service | Where-Object { $_.Name -match 'fleet|orbit|osquery' } |
  Format-Table Name,Status,StartType -AutoSize
Compare the hash against Ubuntu’s SHA-256 value. MSI code 0 means success; 3010 means success with a restart required. For other codes, inspect the installation log. Confirm the actual service name; file presence alone is insufficient. Wait for the device to appear online. Check DNS and connectivity while troubleshooting TLS and enrollment:
Resolve-DnsName fleet.example.internal
Test-NetConnection fleet.example.internal -Port 8443
A reachable TCP port is not proof of enrollment. Fleet should also receive a recent last-seen timestamp, OS details, and software inventory. Once the first endpoint works, distribute the MSI through your software-deployment system.
7. From inventory to vulnerability tracking
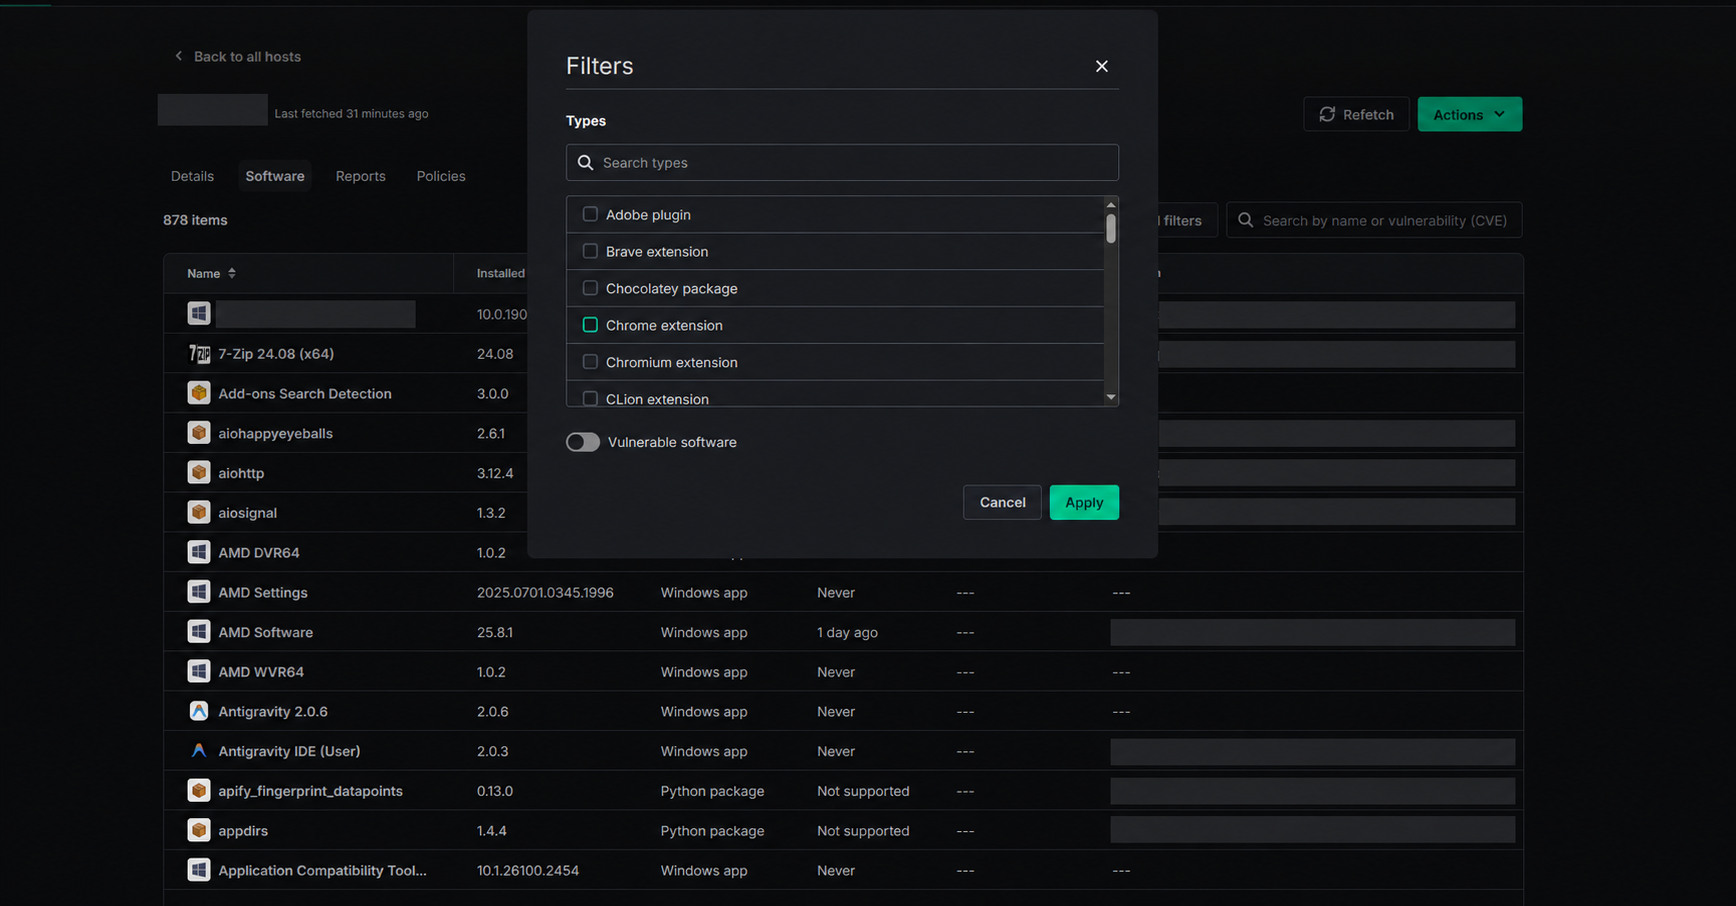
When an advisory arrives, search under Software and inspect versions and associated endpoints. Menu names vary by release; the relationship is software → version → device → CVE.
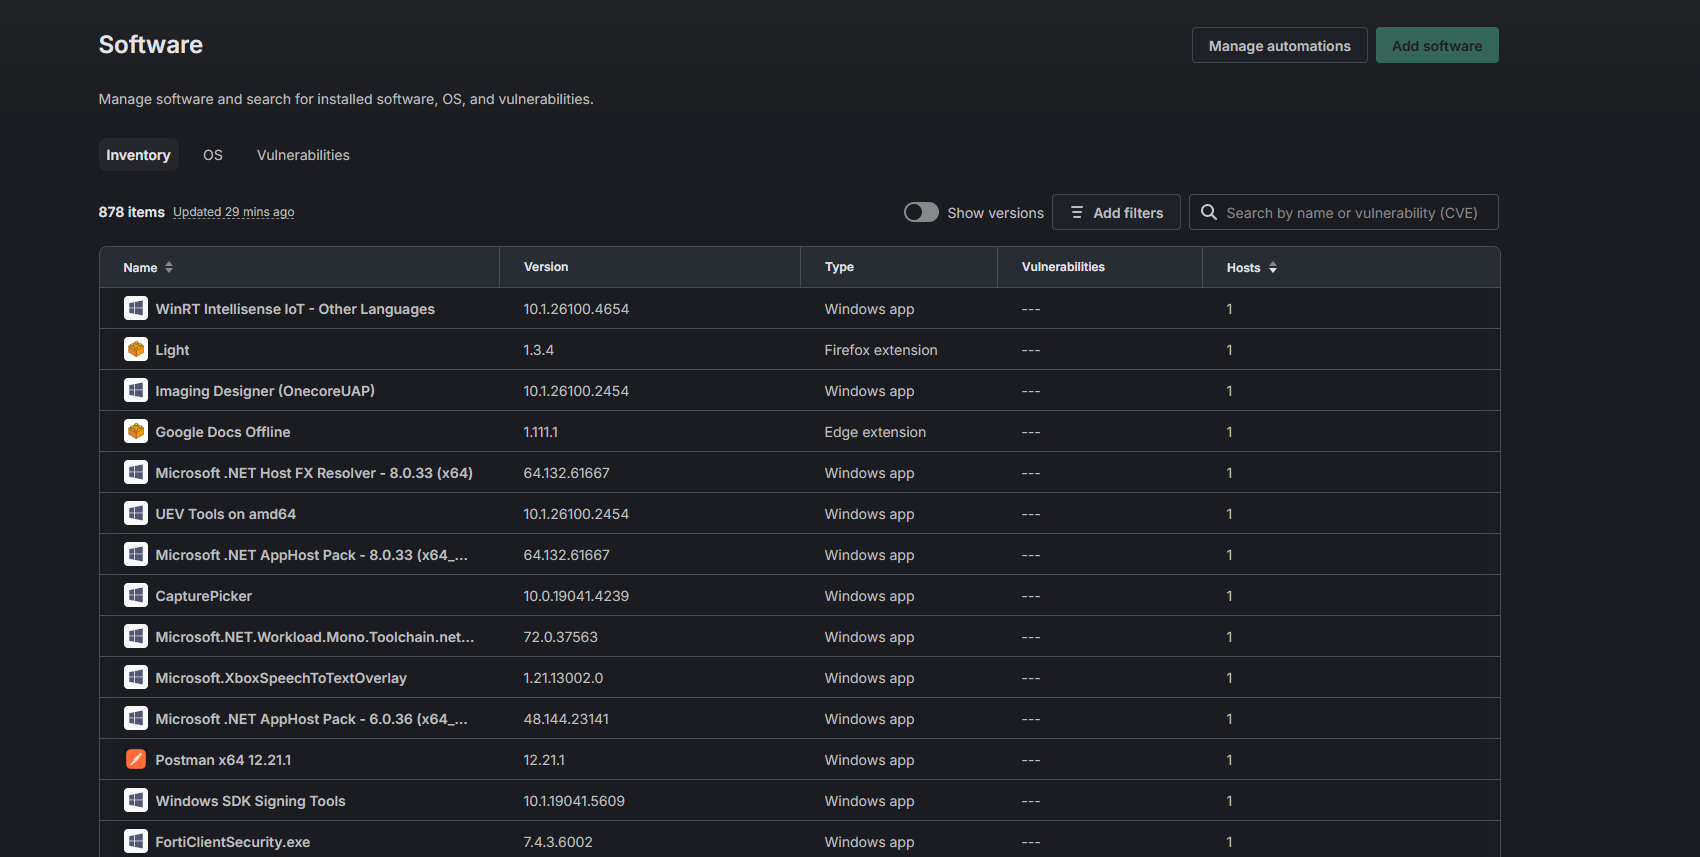
For a 7-Zip advisory, my workflow is:
- Check the affected range in the vendor advisory and CVE record.
- Locate installed versions and associated devices in Fleet.
- Review CVE matches alongside inventory freshness.
- Prioritize updates based on device role and exposure.
- Verify check-in and the newly reported version after updating.
This reduces repeated spreadsheet work. Missing CVE data, product normalization, or version matching can still leave findings absent. Independently compare inventory against the affected range for critical advisories.
Validate the workflow with 7-Zip
CVE-2025-0411 is a Mark-of-the-Web bypass in 7-Zip. Version 24.09 contains a fix; 24.08 is an example of an older affected release. References: 7-Zip history and NVD.
First verify the Windows test device’s version independently:
Get-Item 'C:\Program Files\7-Zip\7z.exe' | Select-Object FullName,
  @{Name='FileVersion';Expression={$_.VersionInfo.FileVersion}},
  @{Name='ProductVersion';Expression={$_.VersionInfo.ProductVersion}}

Get-ItemProperty HKLM:\Software\Microsoft\Windows\CurrentVersion\Uninstall\* ,
  HKLM:\Software\WOW6432Node\Microsoft\Windows\CurrentVersion\Uninstall\* `
  -ErrorAction SilentlyContinue |
  Where-Object { $_.DisplayName -match '^7-Zip' } |
  Select-Object DisplayName,DisplayVersion,Publisher,InstallLocation
The purpose is to inspect reporting and CVE relationships, not run an exploit. Use an isolated test endpoint or existing inventory record rather than installing vulnerable software on an everyday workstation. Afterwards, update to a current supported release.
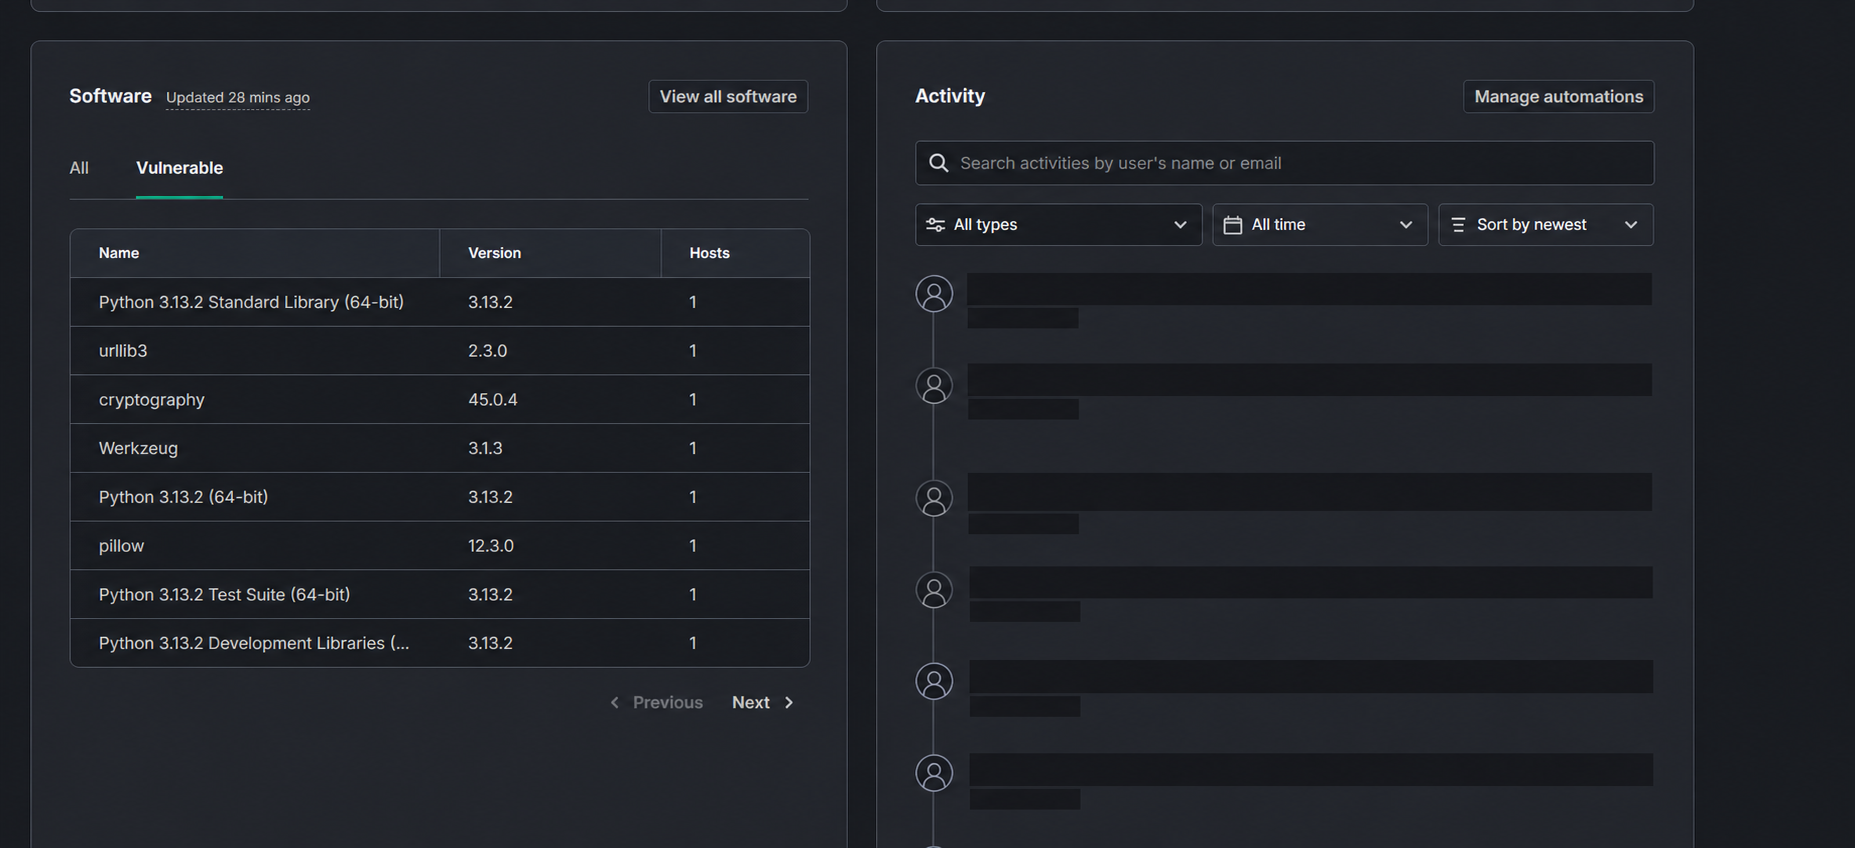
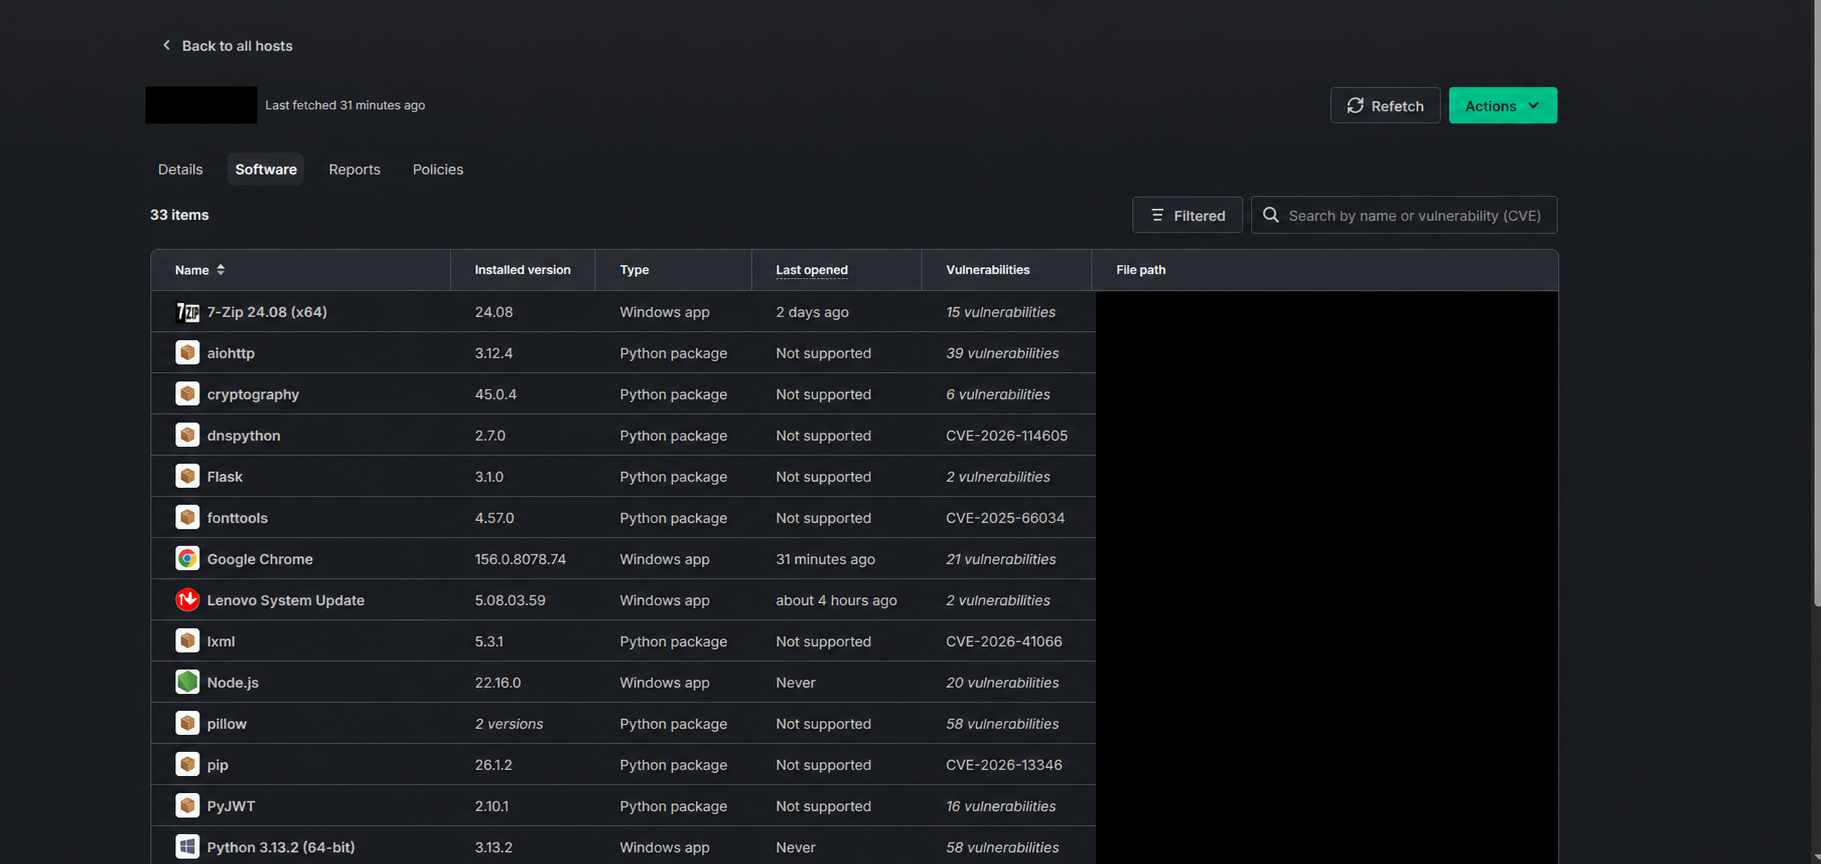
Initial logs only showed scan startup. The later screenshots show the Vulnerable list and per-device results. For example, 7-Zip 24.08 has 15 reported vulnerabilities. This demonstrates results in the UI; confirming CVE-2025-0411 specifically still requires opening the detailed findings. Counts reflect the lab at capture time.
8. Check vulnerability scanning
Follow logs on the Fleet server:
sudo journalctl -u fleet -fExample startup records:
level=info msg=pending cron=vulnerabilities schedule=vulnerabilities
level=info cron=vulnerabilities periodicity=1h0m0s
level=info msg="scanning vulnerabilities" cron=vulnerabilities
These indicate scanning started. Another job’s completion, such as apple_mdm_dep_profile_assigner ... status=completed, does not prove this scan finished. Check the cron=vulnerabilities context. The one-hour interval is this lab’s setting; verify yours. Assess subsequent logs, errors, and UI results together:
sudo journalctl -u fleet --since '1 hour ago' --no-pager \
  | grep -Ei 'vulnerabilit|complete|error|fail'
If manual triggering is needed, check help on the management machine where fleetctl is configured:
fleetctl trigger --help
fleetctl trigger --name=vulnerabilities
A set the Fleet API address error means the CLI address is missing. Set the URL and authenticate. Monitor an already-running scheduled scan instead of repeatedly triggering it.
9. Troubleshooting
Distribute the private CA to Windows
Transfer the CA certificate over a trusted channel. Import it in elevated PowerShell:
certutil -addstore -f Root 'C:\Temp\FLEET-ROOT-CA.cer'Put intermediate CAs in the intermediate store, not Root. Use GPO/Intune for central distribution. Certificate trust does not prove the enrollment secret is correct.
Certificate errors and certs.pem
Management and endpoint components must trust the server chain. Distribute root/intermediate CAs to the correct Windows stores and package fleetd with the right CA file. With --fleet-certificate, Orbit, Fleet Desktop, and osquery use that file as their CA store; relying only on the system store is insufficient in this flow. See Fleet’s certificate guide.
Manual certs.pem edits may not persist because the agent can recreate it. Correct the URL, full server chain, and packaged CA configuration together.
invalid secret
Check the enrollment secret being sent. A wrong team, stale package, or copied whitespace can cause rejection. Select the correct scope and regenerate with the active secret. Investigate TLS errors and secret errors separately.
targets.json: wrong length
TUF metadata expects a different content length from the download. Proxy/CDN caching, partial downloads, and corrupted endpoint cache are possible causes. Obtain the actual URL from the log and compare direct/proxy responses. Reset only the documented TUF cache if needed; do not disable integrity verification.
Inspect downloads and cache locations
Record the URL, filename, and timestamp from the agent log, then locate files:
Get-ChildItem 'C:\ProgramData' -Filter targets.json -Recurse -ErrorAction SilentlyContinue |
  Select-Object FullName,Length,LastWriteTime

Get-ChildItem 'C:\ProgramData' -Filter '*.json' -Recurse -ErrorAction SilentlyContinue |
  Where-Object { $_.FullName -match 'tuf|orbit|fleet' } |
  Select-Object FullName,Length,LastWriteTime
Inspect download headers and byte count:
curl.exe -I 'TUF_TARGETS_JSON_URL'
curl.exe -L -o "$env:TEMP\targets.json" 'TUF_TARGETS_JSON_URL'
(Get-Item "$env:TEMP\targets.json").Length
Compare direct and proxy access: redirects, Content-Length, Content-Encoding, ETag, range responses, and downloaded bytes should be consistent.
Recreate a verified cache
After confirming the download source is healthy, stop the actual agent service. Verify the TUF cache through logs and product documentation, then rename it instead of deleting it so the change remains reversible:
# First verify the actual service name and cache directory.
Get-Service | Where-Object { $_.Name -match 'fleet|orbit|osquery' }
Stop-Service -Name 'ACTUAL_SERVICE_NAME'

Rename-Item -LiteralPath 'C:\VERIFIED\TUF-CACHE' -NewName 'TUF-CACHE.backup-20261030'
Start-Service -Name 'ACTUAL_SERVICE_NAME'
If a fresh download fails again, investigate the proxy/CDN. TUF is rejecting content that failed integrity validation; do not turn that check off.
context canceled during restart
An unlock failed ... context canceled message at shutdown does not alone prove persistent Redis failure. Confirm a new Fleet process starts and work resumes. If it occurs during normal operation, correlate Fleet and Redis logs for that period.
Quick troubleshooting reference
| Symptom | Check and action |
|---|---|
| CLI asks for server address | Configure --address and authentication for this machine/user. |
-tls-ca is unrecognized | Check help; the tested release uses --root-ca. |
| TLS chain/hostname validation fails | Check SAN, external URL, full chain, and client CA. |
invalid secret | Verify environment/team and the active packaged secret. |
certs.pem is recreated | Fix packaged CA configuration rather than editing it manually. |
| TUF length mismatch | Inspect source, proxy, and verified cache separately. |
| Scan started but CVE is absent | Check same-job completion, host check-in, and product/version matching. |
10. Optional: inspect logs with Elasticsearch and Kibana
This stack collects logs for investigation; it does not perform Fleet’s CVE matching. Plan storage, access control, and retention separately.
10.1 Elasticsearch and Kibana
A lab can run these on the same host. Do not expose Elasticsearch directly to the public internet in production. Use TLS, authentication, and role-based access. Keep components on compatible releases.
Add the signed repository following Elastic’s Debian/APT instructions for your Ubuntu and Elastic versions. Do not treat these commands as an unplanned existing-cluster upgrade. Once the repository is ready:
sudo apt update
sudo apt install -y elasticsearch kibana filebeat
sudo systemctl enable --now elasticsearch
Prepare CA and administrator credentials from Elasticsearch’s security setup output. Complete Kibana enrollment/configuration for that release before starting it:
sudo systemctl enable --now kibanaCA paths, HTTP TLS, and Kibana’s address depend on your installation. Fleet does not require these services, so finish the core Fleet/Windows workflow first.
Check services:
sudo systemctl status elasticsearch kibana --no-pager
curl --cacert /etc/elasticsearch/certs/http_ca.crt -u elastic https://localhost:9200
Adapt paths and authentication to your installation. curl -u elastic requests the password interactively; do not use that administrator account for Filebeat publishing.
10.2 Collect Fleet’s journal with Filebeat
Configure one source for Fleet logs and reverse-proxy logs if needed. Use journald for systemd logs, or the actual file path for file-based logging. Avoid collecting the same events from both.
Adapt this configuration to your environment:
filebeat.inputs:
  - type: journald
    id: fleet-service
    include_matches.match:
      - _SYSTEMD_UNIT=fleet.service

output.elasticsearch:
  hosts: ["https://localhost:9200"]
  username: "filebeat_writer"
  password: "${ELASTICSEARCH_PASSWORD}"
  ssl.certificate_authorities: ["/etc/elasticsearch/certs/http_ca.crt"]
Provide ELASTICSEARCH_PASSWORD through Filebeat’s keystore. The service needs permission to execute journalctl and read the journal. Reference: Elastic journald input.
Create an Elasticsearch publishing account with permissions for the target index/data stream. filebeat_writer is an example, not an automatically created user. Index-template and ILM setup can need extra privileges; plan those separately from ongoing publishing. The hostname in hosts must match the Elasticsearch certificate SAN.
If no keystore exists, create one and add the password interactively. Use the same user/data-directory context as the service, normally root in a standard DEB install. Do not recreate an existing keystore:
sudo filebeat keystore list
# Only if the keystore does not exist:
sudo filebeat keystore create
sudo filebeat keystore add ELASTICSEARCH_PASSWORD
Reference: Filebeat secrets keystore. Test before enabling:
sudo filebeat test config
sudo filebeat test output
sudo systemctl enable --now filebeat
# If you changed the configuration of an already running Filebeat:
sudo systemctl restart filebeat
sudo journalctl -u filebeat -n 100 --no-pager
Create a Kibana Data View for the index/data stream receiving Filebeat events. Example KQL: message : "scanning vulnerabilities" or message : "cron=vulnerabilities". Set the time filter to include the event. Timestamps ending in Z are UTC; Türkiye uses UTC+3. This lets you follow scan startup through Elastic too.
Licensing of management features
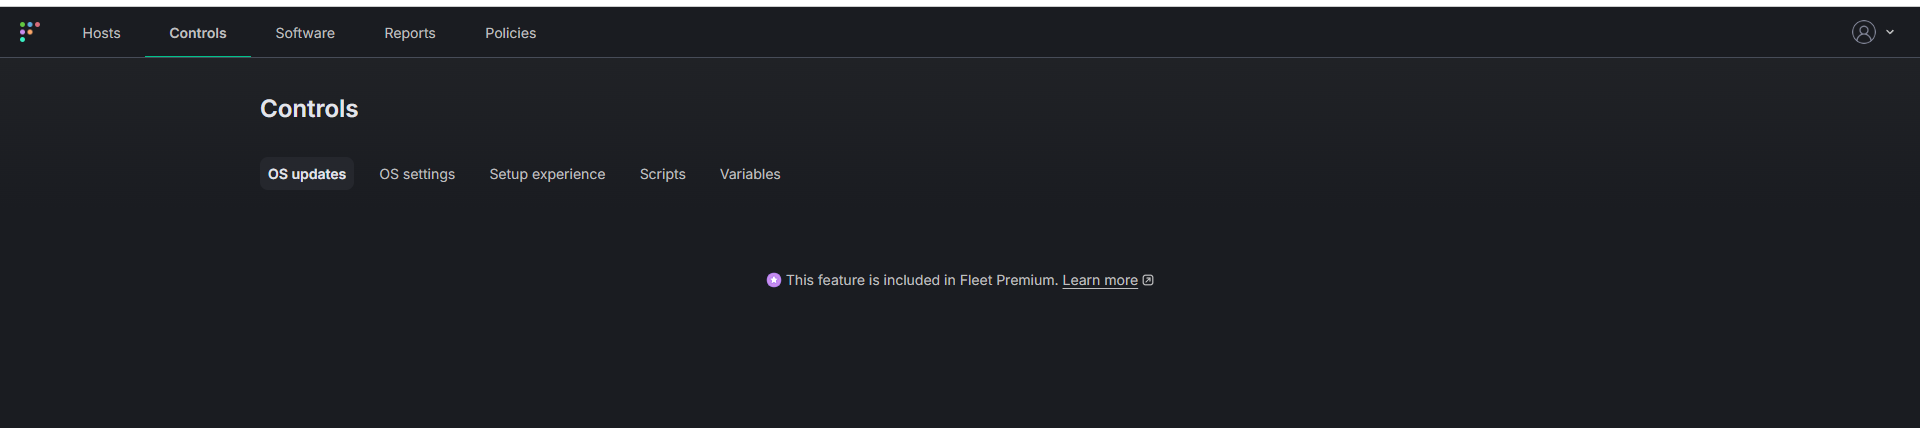
The lab’s Controls → OS updates screen shows a Premium notice. When moving from visibility to enforced updates, check the license needed for the specific capability.
11. Move from deployment to daily operations
The first enrollment is the beginning. Refreshed inventory and action on findings make the platform useful. Before handover, verify:
- The Windows device is online and sends current software inventory.
- Fleet starts automatically after a server restart.
- The certificate, DNS name, and packaged server URL are consistent.
- Vulnerability jobs run, and errors/data-source issues are monitored.
- Updated application versions appear in inventory.
- MySQL backups, Fleet configuration, and keys have a recovery plan.
My starting point was the repeated inventory work behind every advisory. Centralizing device and version information helps answer “Where is this software installed?” faster, leaving more time to assess impact and verify updates.
References and an alternative deployment
- Anthropic: Project Glasswing update
- Fleet releases and server packages
- Fleet server configuration
- Fleet compatibility FAQ
- Fleetctl guide
- Fleet enrollment guide
- Elastic: Filebeat journald input
For containers, Fleet’s official Docker Compose guide is an alternative. Choose one path rather than mixing its services with this systemd deployment.